AWS S3 HomeLab Part 1: Fundamentals & CLI Refresher
Creating buckets, Uploading Files, and Deleting them.
So in this blog. I will be discussing my journey on AWS Services S3. S3 is one of the oldest service offered by AWS and is one of the mostly used services. Learning S3 is crucial for me to progress in my cloud journey. In my learning, I will be using Matt Pocock’s /teach skill in guiding my learning and creating different lab experiments for me to work on. I think this is one of a good beneficial uses of AI to learn the fundamentals and explore new knowledge without going into technical debt.
A Quick Review of S3
Amazon Simple Storage Service (AWS S3) is a cloud-based object storage service designed to store and retrieve any amount of data from anywhere on the web, offering industry-leading scalability, data availability, security and performance.
Core Concepts
- Buckets and Objects: Unlike traditional file systems with folder hierarchies, S3 is a flat object store. Data is stored as files (objects) inside top-level containers called buckets. Each object consists of data itself, variable metadata, and a unique key (file path name).
- 11 9s of Durability: S3 is engineered for 99.999999999% durability over a given year. It achieves this by creating and storing multiple copies of your data across at least three physically separated Availability Zones (AZs) within an AWS Region.
- REST API Access: Every bucket and object can be accessed via standardized HTTP/HTTPS request, making it easy to integrate with web applications, backup scripts, and data lakes.
Key Features & Capabilities
- Tiered Storage Classes: AWS offers specialized tiers tailored to different access frequencies and costs. These are range from S3 Standard (for active, frequently accessed data) down to S3 Glacier Deep Archive (for long-term digital preservation at the lowest cost). Refer to this article S3 Storage Classes
- Lifecycle Policies: You can set automated rules to transition objects between storage classes as they age—such as moving logs to cold storage after 30 days or deleting them after a year—to optimize costs automatically. Refer to this article AWS S3 Managing the lifecycle of objects
- Versioning: When enabled, S3 retains multiple variants of an object in the same bucket. This protects critical data against accidental overwrite or permanent deletion. Refer to this article How S3 Versioning works
- Security & Access Control: Data is protected by default with encryption at rest and in transit. Access is managed through fine-grained IAM policies, S3 Bucket Policies, and Access Control Lists (ACLs). Public access is blocked by default on all new buckets. Refer to this article AWS S3 Security and Access Management
- Event Notifications: S3 can trigger automated workflows (like AWS Lambda functions or SNS notifications) whenever specific actions occur in a bucket, such as when a new image or dataset is uploaded. Refer to this article Amazon S3 Event Notifications
Lab 01: Creating a Bucket
In this lab we will be creating a simple bucket in S3 using the AWS Console and AWS CLI.
Using AWS Console
In this section we will be exploring AWS Console and how to create a bucket and upload files to S3 using the AWS Console.
Create a bucket
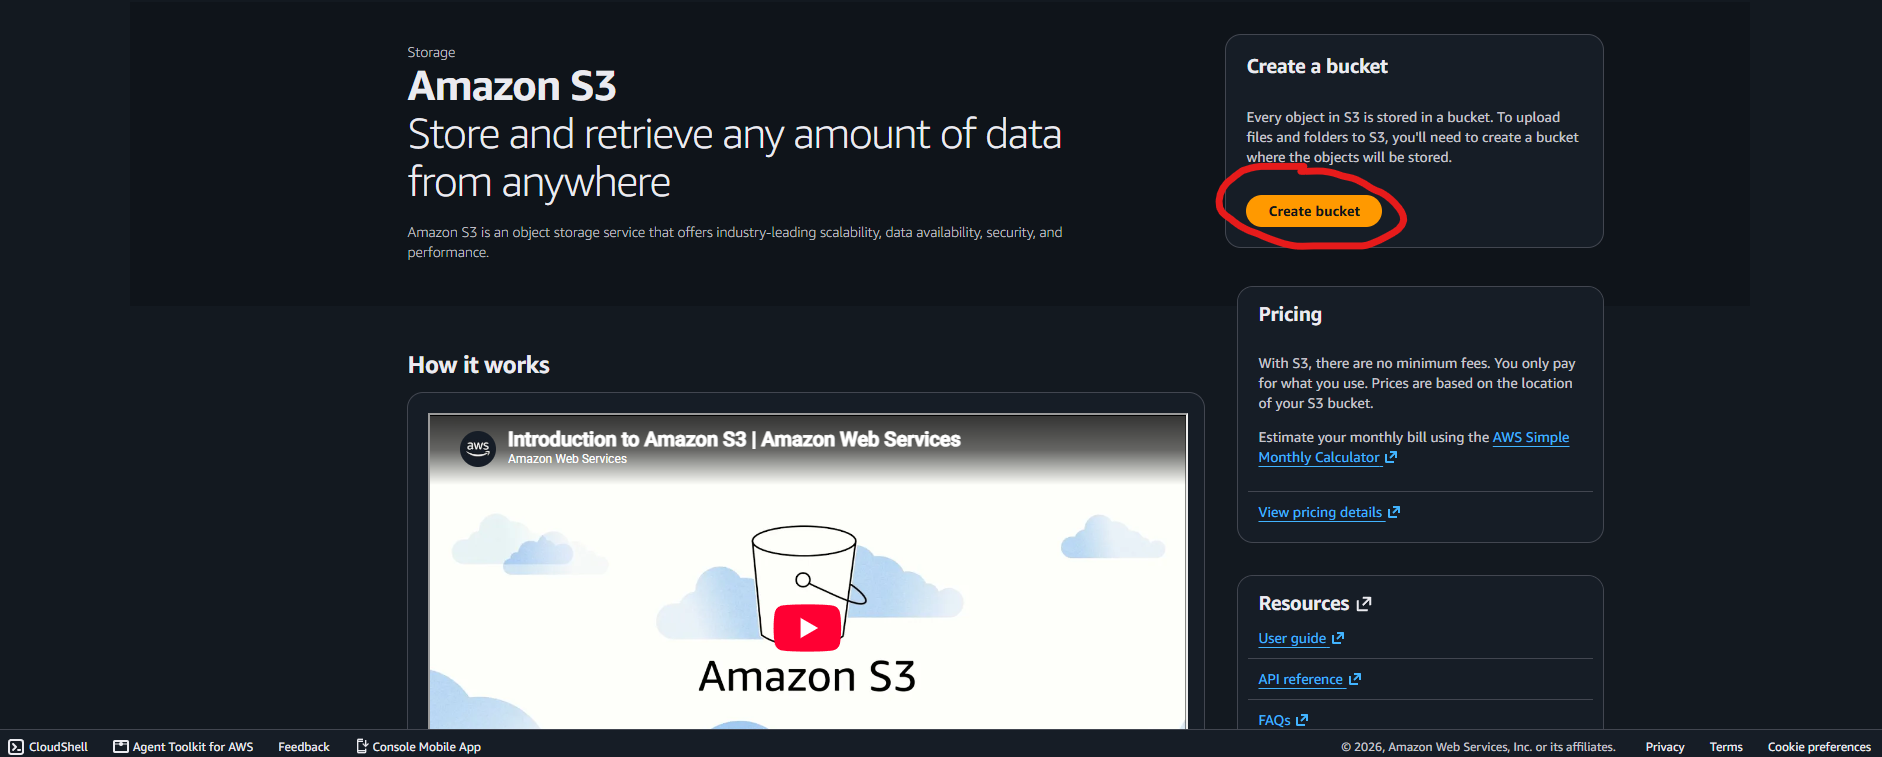
In this part we are presented with the main dashboard. In order to create a bucket. Let us click the Create bucket button.
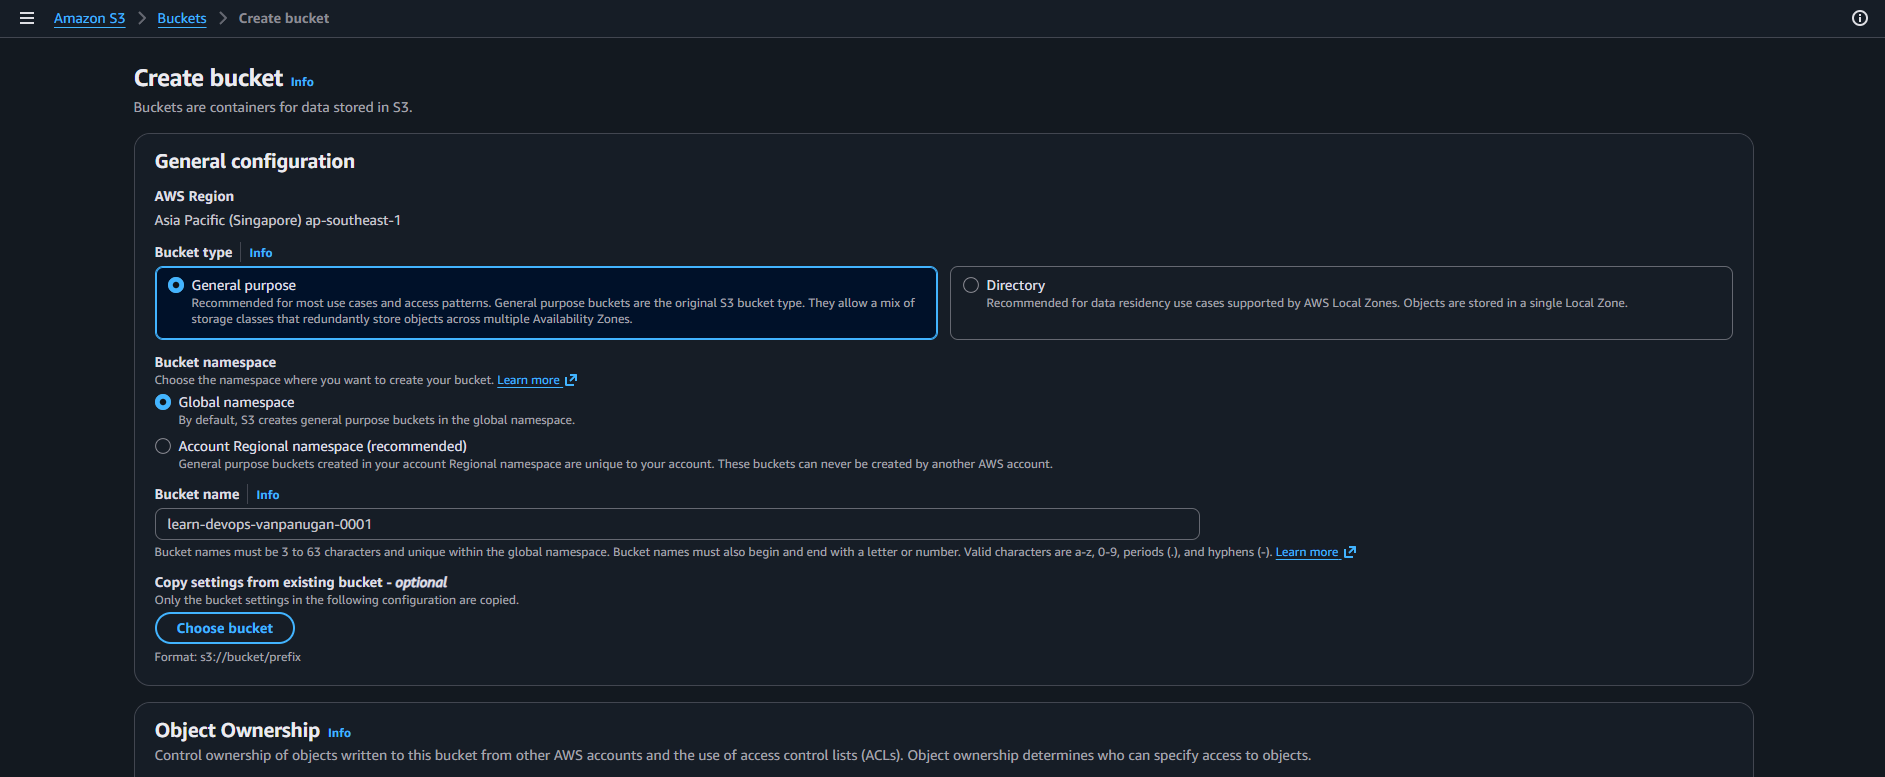
When we clicked the Create bucket button. We are presented with a configuration for the bucket. We set the AWS Region to Asia Pacific (Singapore) ap-southeast-1 since we are located in the Philippines. Next, is the the bucket type. We picked the General Purpose since that we don’t need *workloads or performance-*critical application that require consistent single digit millisecond latency from a Directory .
In the legacy Global namespace, a bucket name must be completely unique across every AWS account and Region in the world, meaning if another company anywhere already owns a name like app-logs, your creation request will fail. In contrast, the modern Account Regional namespace scopes uniqueness exclusively to your individual AWS account and target Region by automatically appending a deterministic system suffix to your bucket prefix.
We then name the Bucket Name to learn-devops-vanpanugan-0001
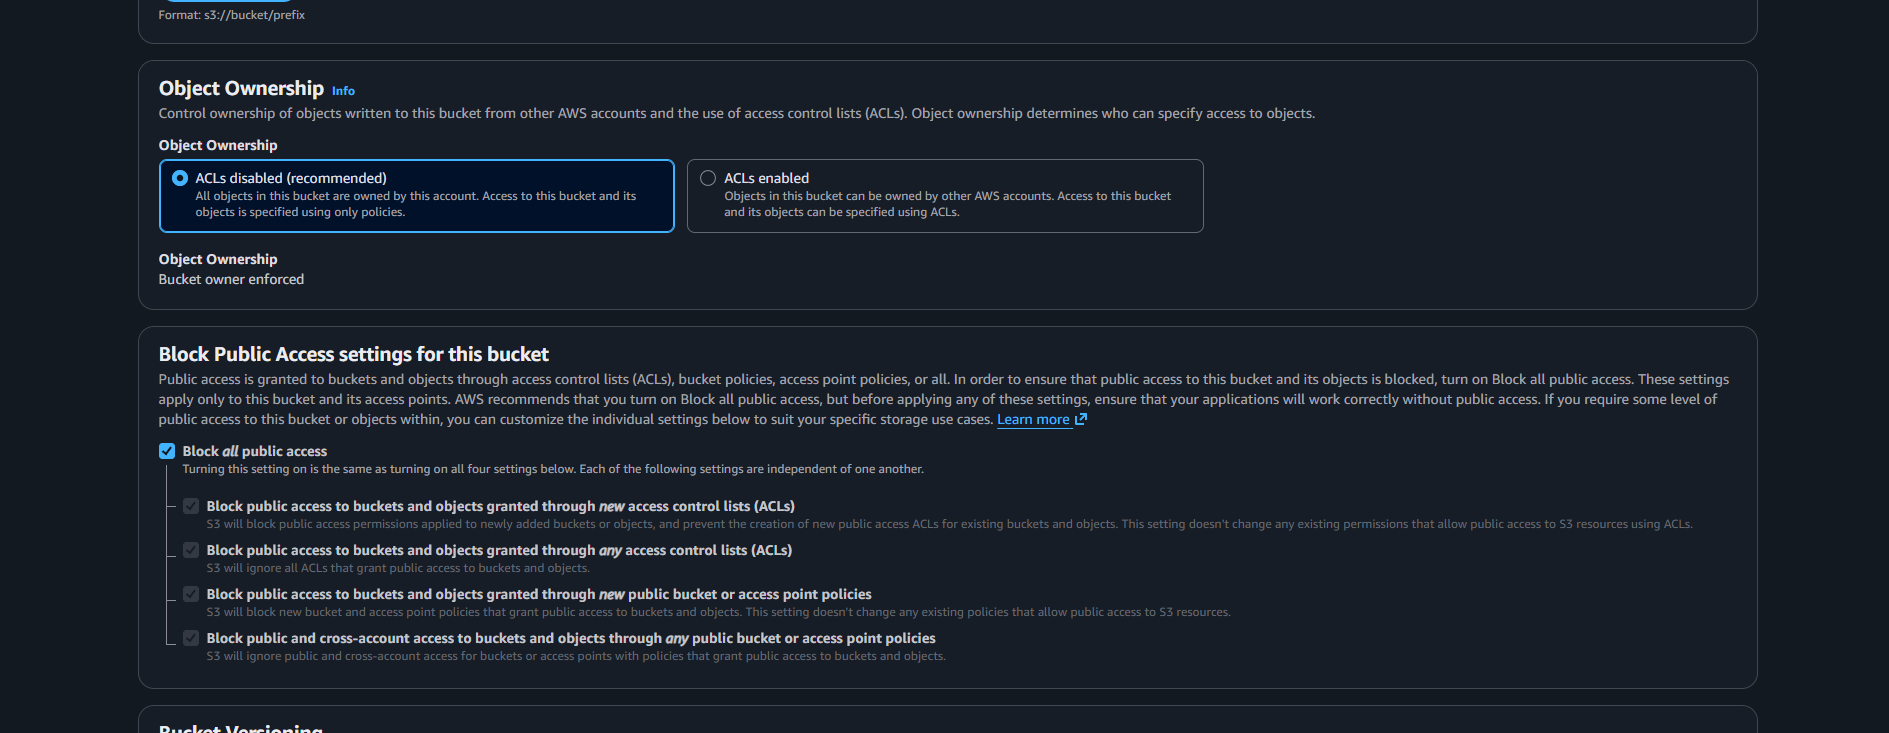
We set the Object Ownership to ACLs Disabled since that we are the only one having access to this account. We also blocked all Public Access for this bucket.
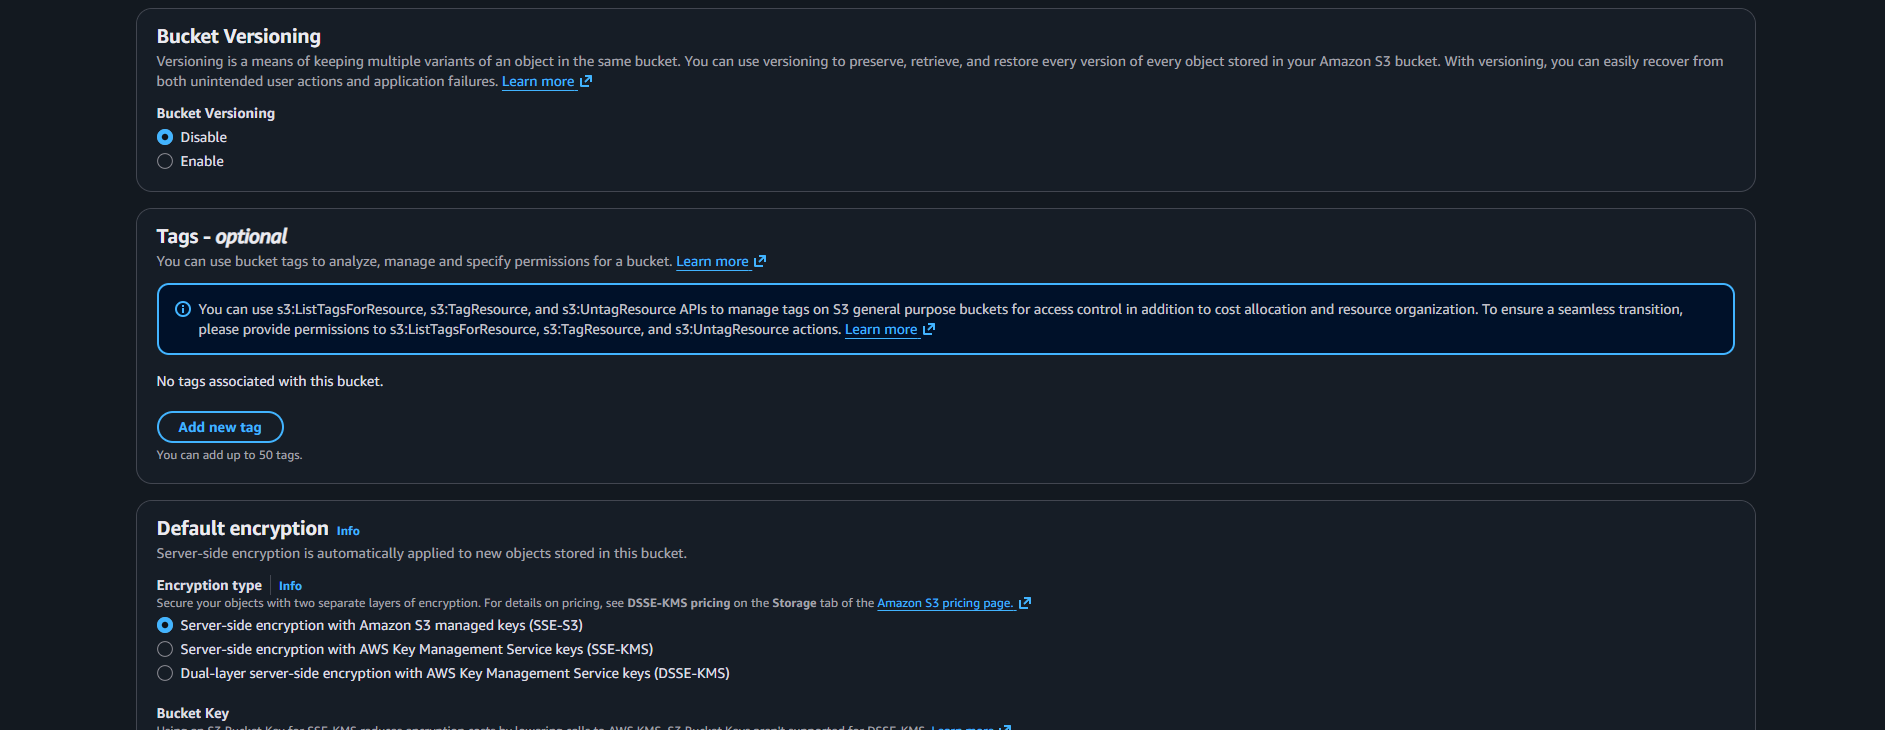
We disabled Bucket Versioning and keep the Default encryption to Server-side encryption with Amazon S3 managed keys
We then click the Submit button to create the bucket. When we finally created the bucket!
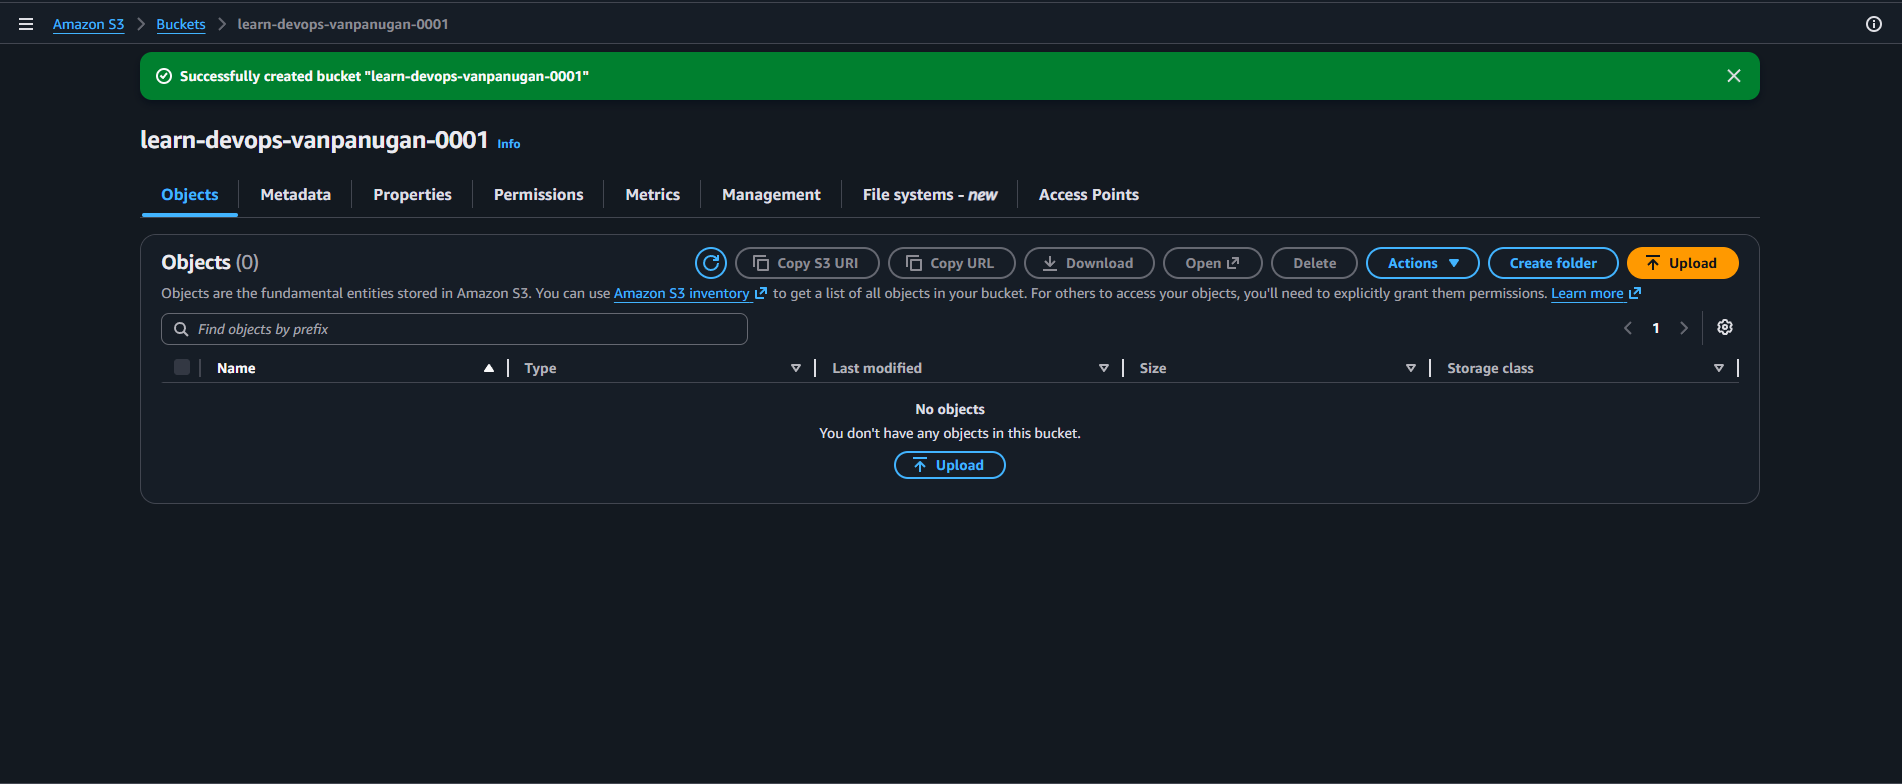
Let us now proceed in uploading a file.
Uploading file
We are presented with a dashboard for the S3 Bucket. We first have to click “Upload” to upload the file.
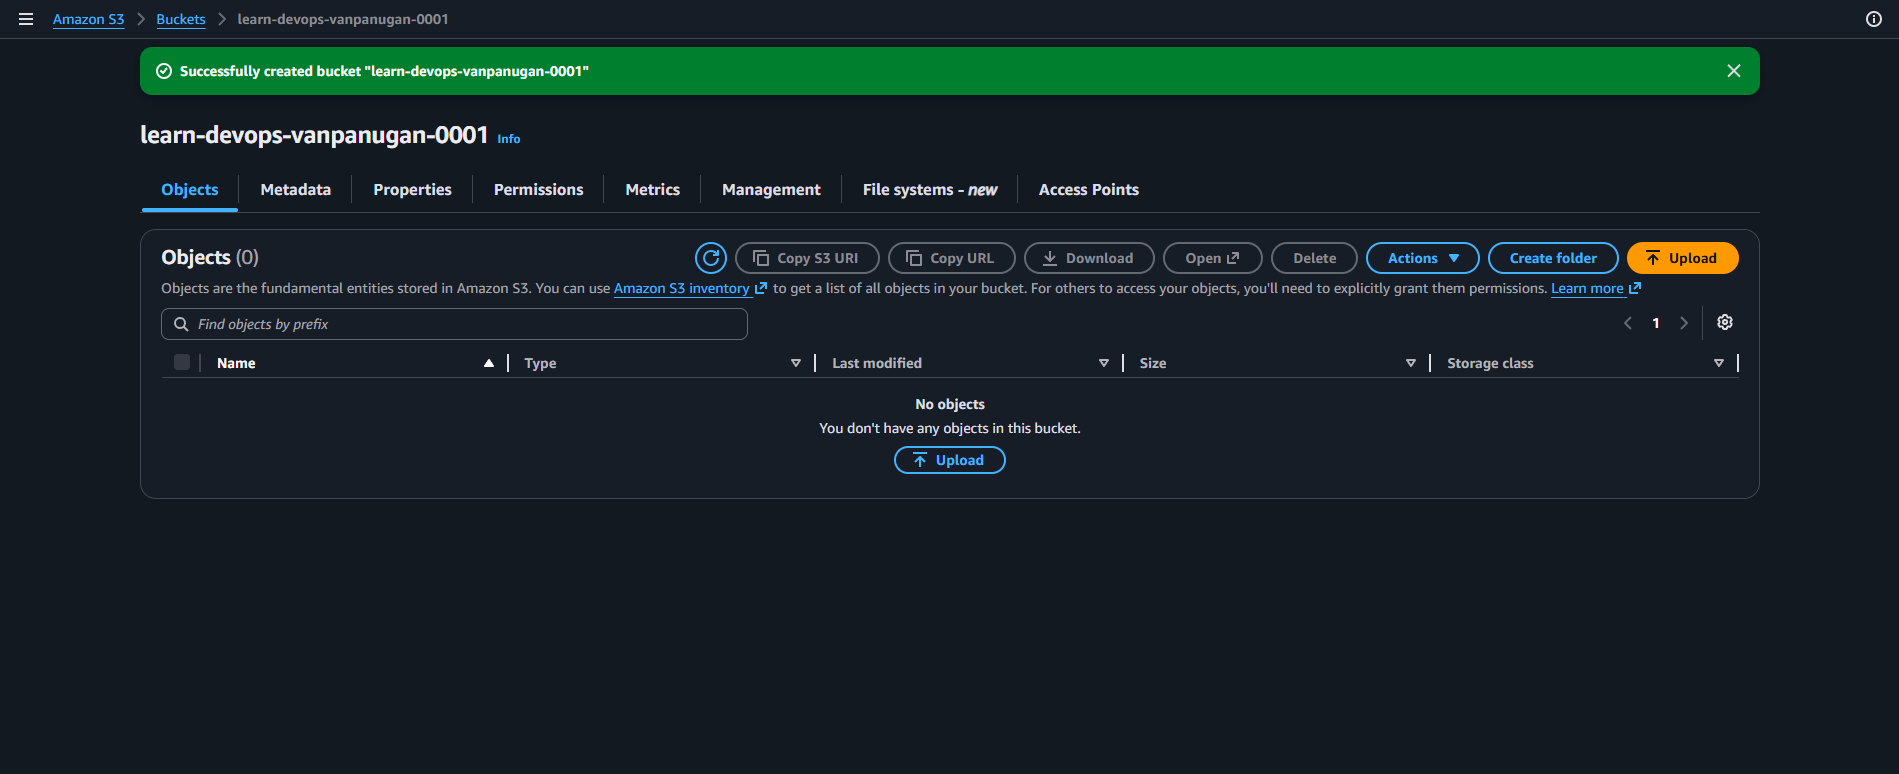
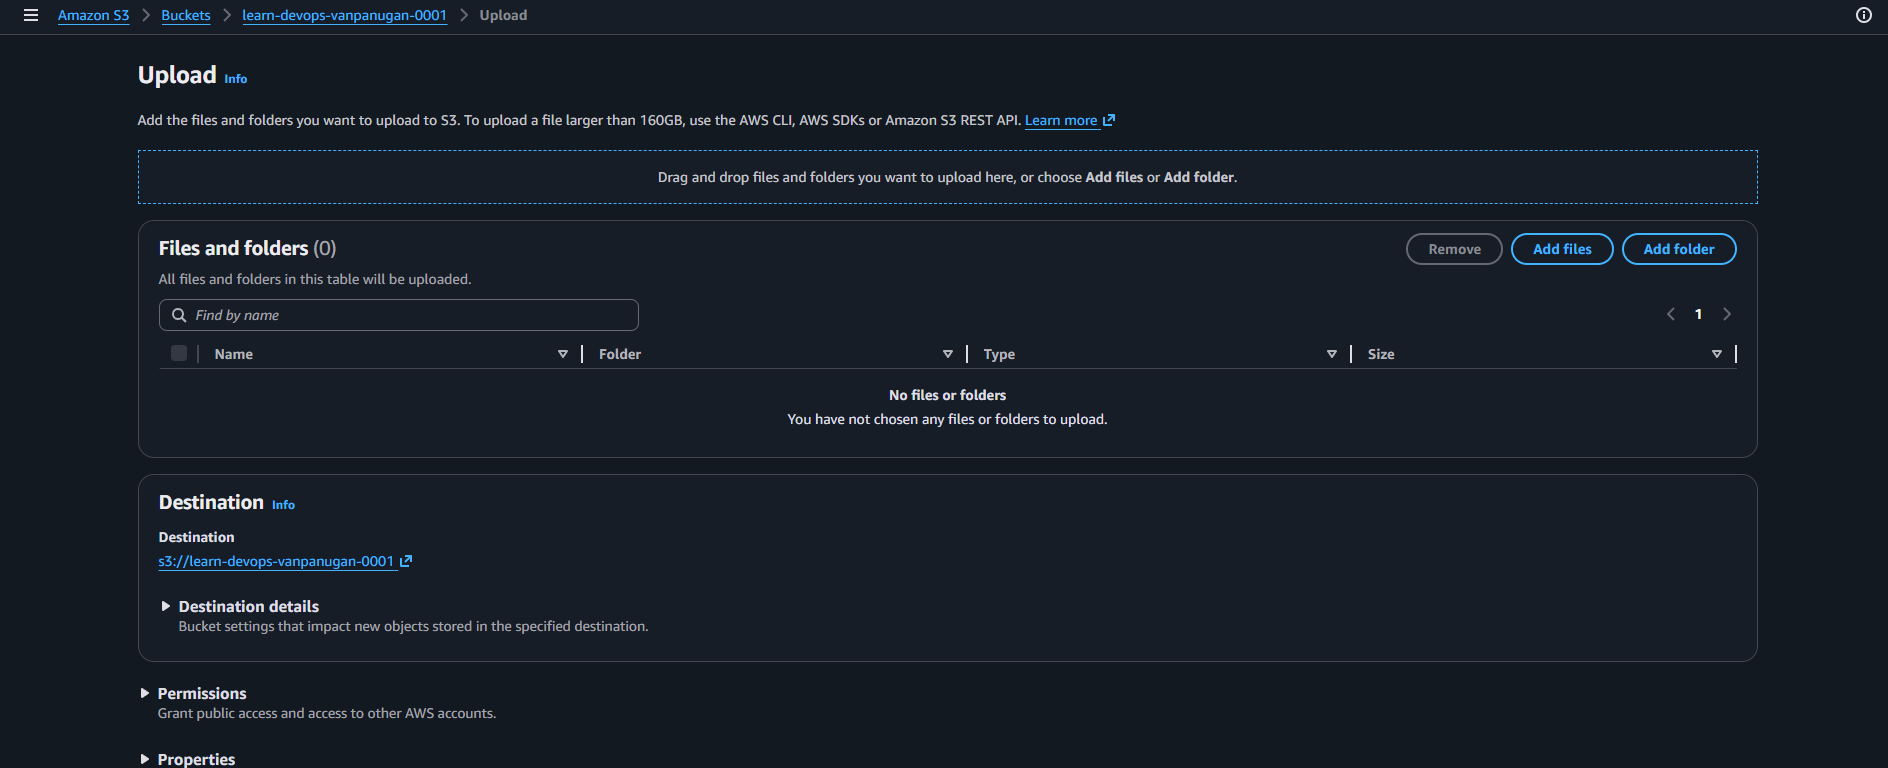
By clicking “Upload”, we are presented with a new window. We can upload single files, multiple files, and even a directory! Let us upload two files into our bucket
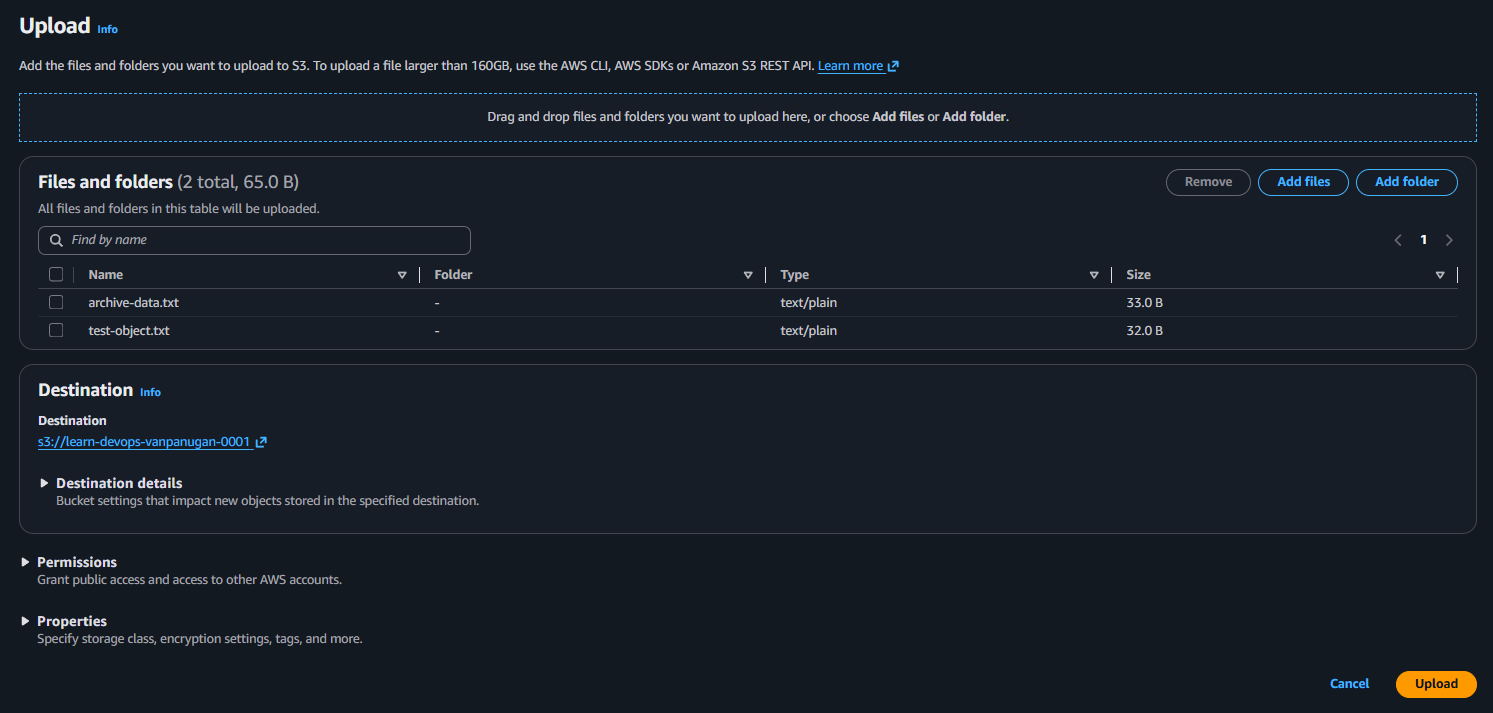
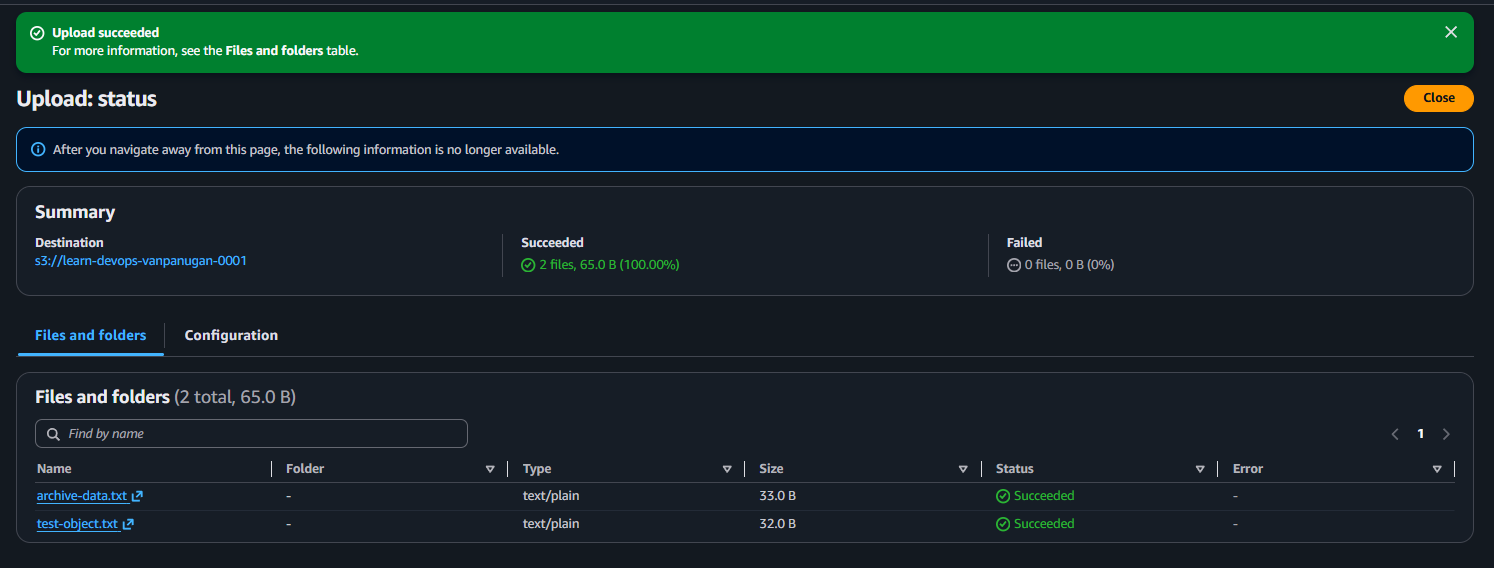
By Selecting the files, we are now ready to upload. Clicking the “Upload” would finally put our files into the S3 Bucket.
When the status of the upload is finish it shows a quick overview of the files and which files were successfully uploaded to the Bucket.
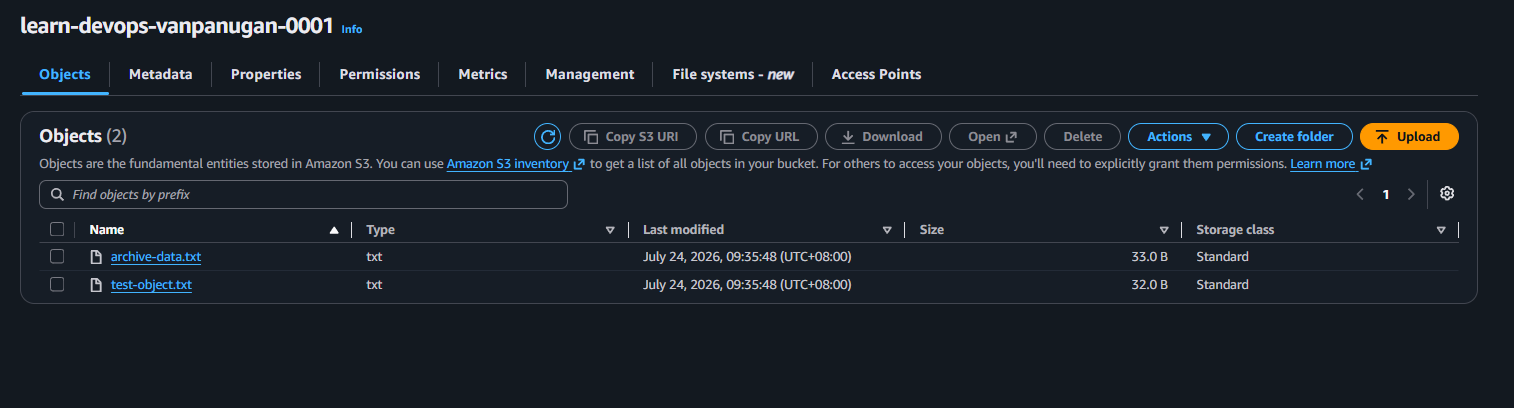
We now see that the files is contained in the S3 Bucket.
Downloading the object
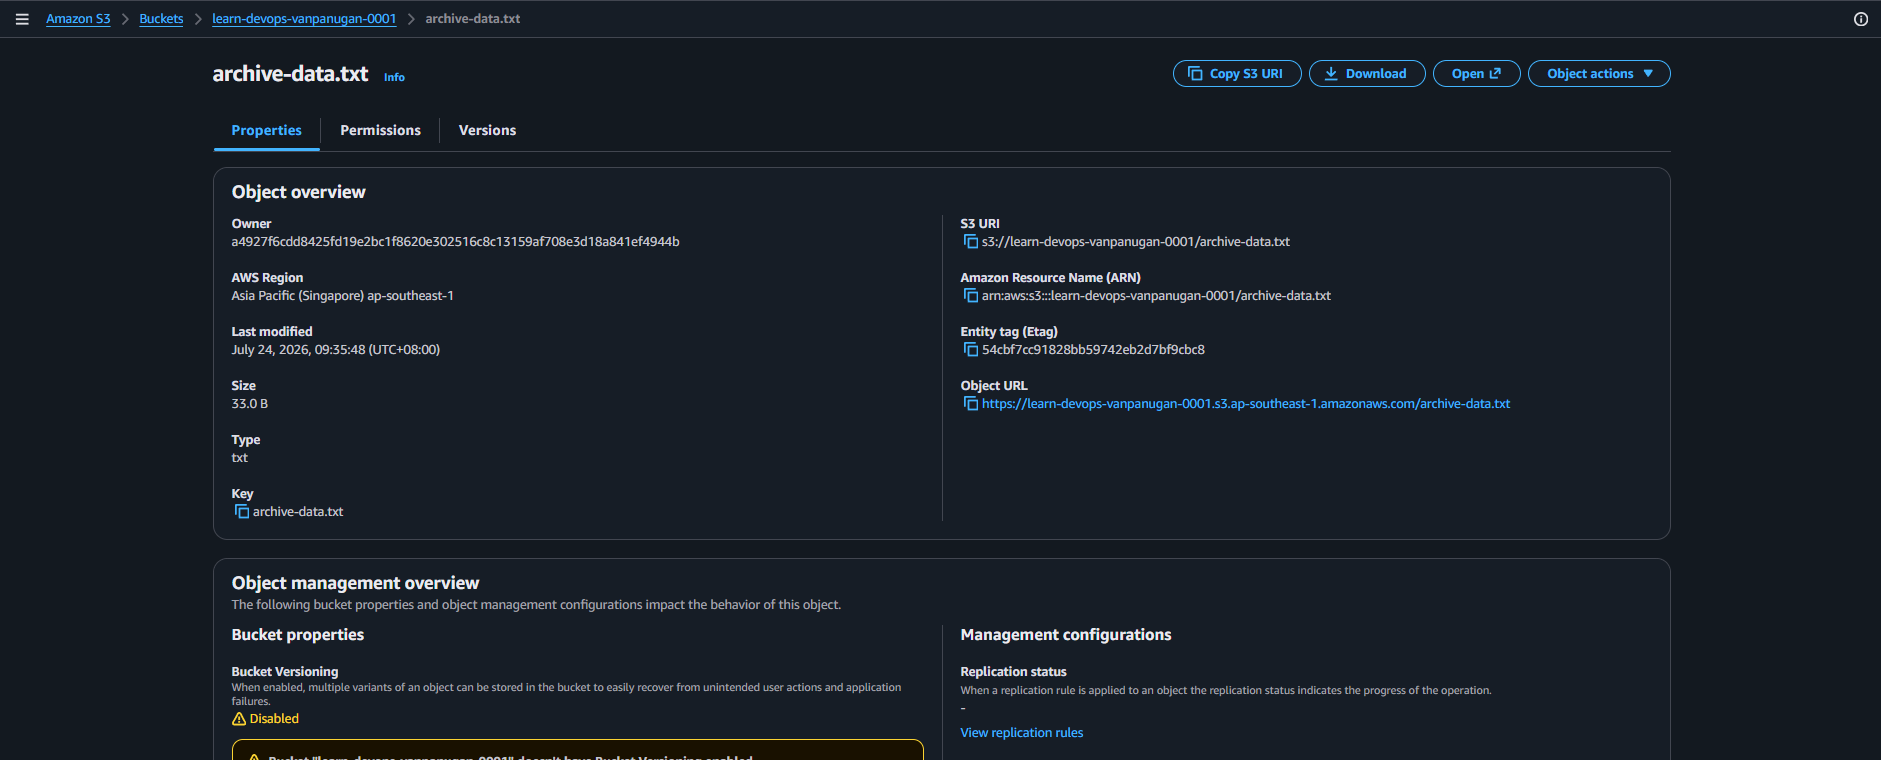
Now let us try downloading the files using AWS Console.
Clicking the file archive-data.txt , we are presented with a new window. Clicking the Download button and it will download.
Clean up
Now let’s remove delete the objects and the bucket itself.
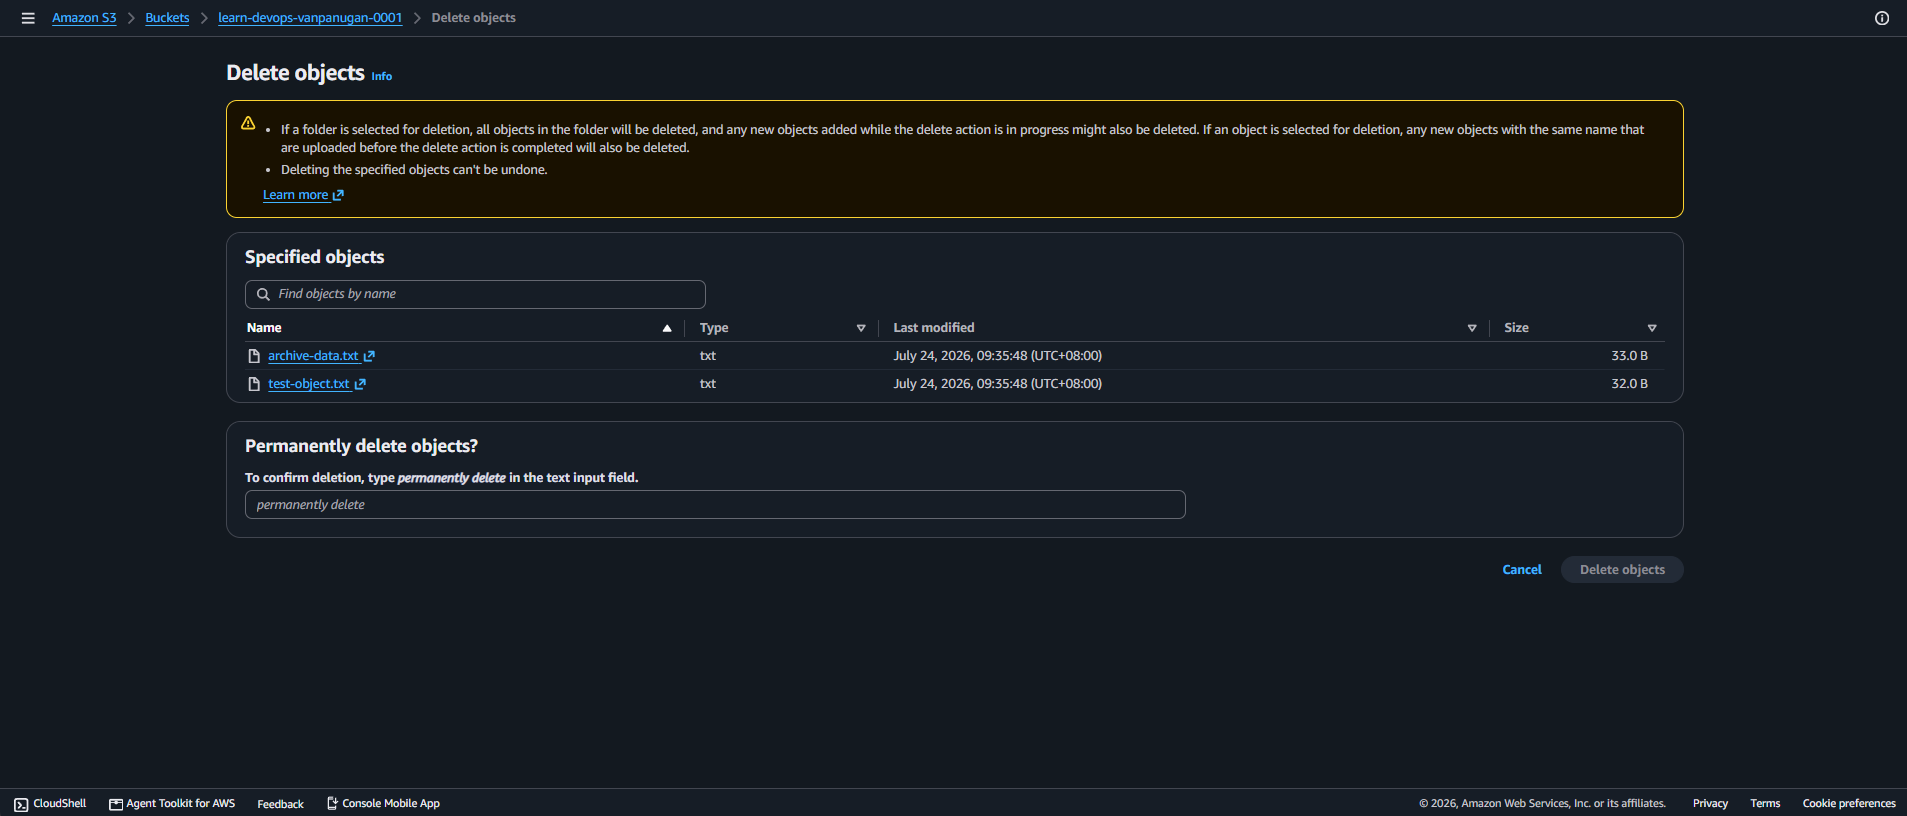
Going back to the bucket dashboard, we can select multiple files and press the Delete button. It will show a new page where we need to confirm the deletion.
Now let us delete the bucket. By selecting the bucket and clicking the Delete button. We can delete it. A confirmation page will show and then delete it.
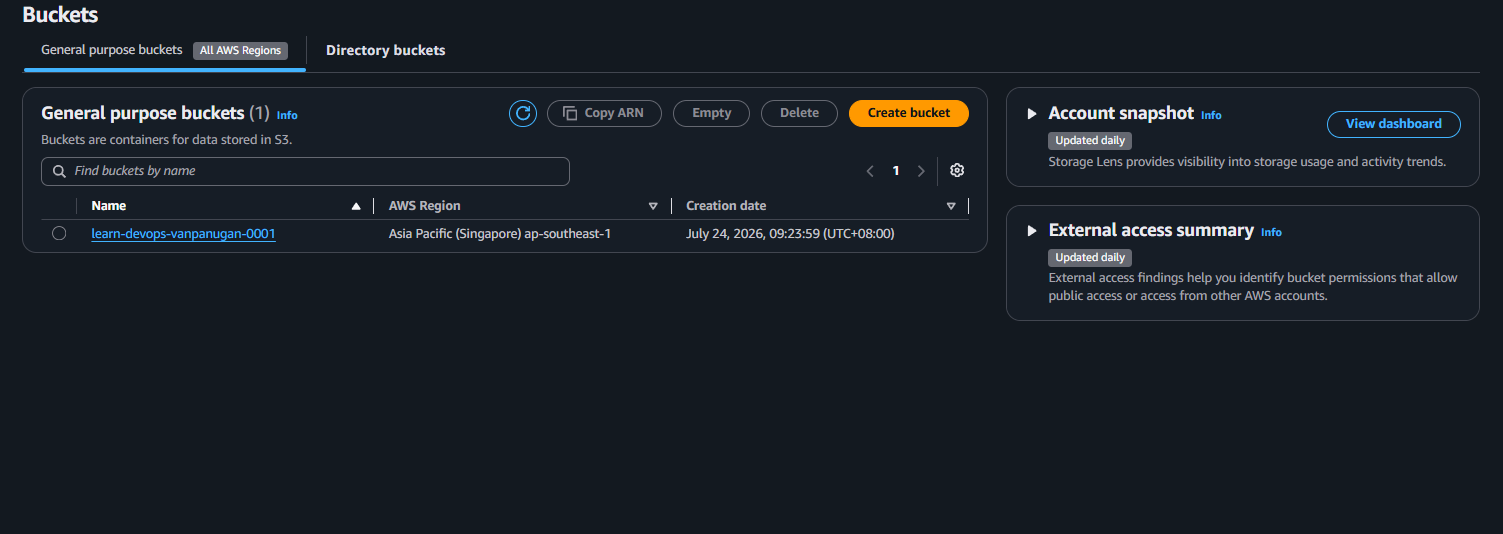
Using AWS CLI
For this part. We first have to follow pre-requisites. First is the installation of AWS CLI and setting up the connection between the CLI and to our AWS Account. There are different ways of connecting such as:
- Console sessions as short-term credentials.
- IAM Identity Center (SSO)
- IAM Identity Center (Legacy SSO)
- Short-term credentials
- IAM Role
- Long-term credentials
For this session we will be using Console sessions as short-term credentials this is good since it Just-In-Time (JIT) access to ensure that we practice credential hygiene.
I first used Google Gemini in giving me steps on connecting my AWS Root Account to AWS CLI. It still uses the old methods of generating an access keys. It did not present me with other options. So it is really good to read documentation first.
Refer to this documentation: Setting up the AWS CLI
Create a bucket
In this part we will be simply creating a simple bucket. Using this command:
aws s3api create-bucket \
	--bucket learn-devops-VanPanugan-0001 \
	--region ap-southeast-1 \
	--create-bucket-configuration LocationConstraint=ap-southeast-1
The command above shows that we are using s3api create-bucket command. We will be discussing the options on it
--bucket (string) [required]Name of the bucket that is going to be created.--region (string)The region to use. Overrides config/env settings.--create-bucket-configuration (structure)Specified the Region where the bucket will be created. By default, the bucket is created in the US East (N. Virginia) Region (us-east-1).
Reference: AWS CLI: s3api create-bucket documentation

By putting the command in, we have successfully created a bucket!! Lets dissect the information.
"Location": The virtual-hosted-style URL endpoint for your bucket. By default, your bucket and everything in it are entirely private, so clicking this link right now won't grant access. However, this is the root web address AWS routes to if you later make objects public, set up static website hosting, or interact with the bucket via HTTP APIs."BucketArn": The Amazon Resource Name (ARN). This is the globally unique identifier for your bucket across the entire AWS ecosystem. You will use this exact string (arn:aws:s3:::learn-devops-vanpanugan-0001) frequently in DevOps when writing IAM policies, bucket policies, or granting other AWS services (like EC2 instances, Lambda functions, or GitHub Actions pipelines) permission to read or write to this bucket.
Verify the bucket exists
We know have created a bucket know let’s try verifying the bucket. Using this command.
aws s3 ls | Select-String "learn-devops"Let’s dissect the command. By using the ls command we can list all bucket we have in my AWS Account then by using the | we can filter it using grep for Bash or Select-String for Powershell.

Showing here is the output of the command.
Create a test file and upload it
We know have created and verified the bucket. Let us try uploading something to it. We will be using this command.
"Hello from S3 refresher lab" | Out-File -Encoding UTF8 test-object.txt
aws s3 cp test-object.txt s3://learn-devops-YOURNAME-0001/
For Unix System we will use this command:
echo "Hello from S3 referesher lab" > test-object.txt
aws s3 cp test-object.txt s3://learn-devops-YOURNAME-0001/
We now have created a simple .txt file and uploaded it to our learn-devops-vanpanugan-0001 bucket. Before we proceed let us dissect the s3 cp command.
s3: Tells the CLI that you are working specifically with Amazon Simple Storage Service (S3).cp: The copy subcommand. In the AWS CLI,cpis used to upload files to S3, download files from S3 to your machine, or copy files directly between different S3 buckets.test-object.txt: The source path. Because there is no folder path written before the file name, the CLI looks for this file inside your terminal's current working directory.s3://learn-devops-YOURNAME-0001/: The target destination. Thes3://prefix indicates an S3 URI, followed by the target bucket's name and a trailing slash representing the root level of that bucket.
Reference: AWS CLI s3 Documentation
Upload with a specific storage class
Now let us explore with other AWS S3 classes. In this part, we will try uploading a file into a Standard_IA . Standard-IA (also known as Amazon S3 Standard-Infrequent Access) is for data that is access les frequently, but requires rapid access when needed.
Reference: AWS S3 Storage Class
Know let us try uploading a file into it by using this command:
For PowerShell System:
"This data is rarely accessed" | Out-File -Encoding UTF8 archive-data.txt
aws s3 cp archive-data.txt s3://learn-devops-YOURNAME-0001/ \
  --storage-class STANDARD_IA
For Unix System
echo "This data is rarely access" > archive-data.txt
aws s3 cp archive-data.txt s3://learn-devops-YOURNAME-0001/ \
  --storage-class STANDARD_IA
Know let us dissect the s3 cp command:
-
aws: Invokes the AWS Command Line Interface tool. -
s3: Tells the CLI to use the high-level Amazon S3 service module (optimized for file operations like syncing and copying, unlike the low-levels3apiyou used to create the bucket). -
cp: The copy command — identical in concept to the standard Linuxcpor Windowscopycommand. It copies data from a source to a destination. -
archive-data.txt: The source. Because there is no file path attached to it (likeC:\files\or/home/user/), the CLI looks for this file directly in your terminal's current working directory. -
s3://learn-devops-YOURNAME-0001/: The destination. Thes3://prefix tells AWS you are targeting a cloud bucket rather than a local directory. -
--storage-class STANDARD_IA: This is the most critical flag in the command. By default, S3 uploads files to theSTANDARDtier. Adding this flag forces AWS to store the object in the Standard-Infrequent Access (Standard-IA) tier instead.Reference: https://docs.aws.amazon.com/cli/latest/reference/s3/cp.html
Below is the output of the command, which show that we have successfully uploaded the file to S3 Standard IA:

Inspect the object’s metadata
In this part let’s try inspecting the metadata of the file we uploaded. Shown below is the command we are going to use.
aws s3api head-object \
  --bucket learn-devops-YOURNAME-0001 \
  --key test-object.txt
By running this command we can see the metadata of both test-object.txt and archive-data.txt
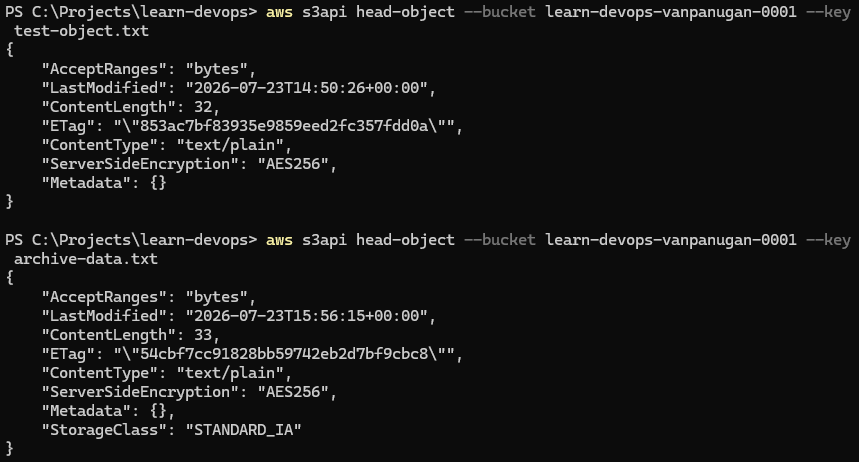
We can are given multiple fields regarding the data of the files. Another thing to note is the Metadata field is empty. The Metadata field is dedicated to the user-defined custom metadata. Meaning we, the user, can create our own metadata for it. Another difference is the StorageClass field. In the archive-data.txt it shows it is in STANDARD_IA since we uploaded it to that specific class.
Furthermore, Etag field is a new concept in my end. So I’ll be delving deeper into it. An ETag (Entity Tag) is a unique fingerprint assigned to a specific version of a file or resource. Its primary job is to verify data integrity and check whether content has changed without needing to re-transfer the entire file.
Adding custom metadata
So in this part, we will be trying to attach our user-defined custom metadata. The primary purpose of custom metadata is to make a file self-describing, allowing automated systems, scripts, and developers to understand the context, origin, and state of a file without having to download or open it.
In cloud environments like AWS S3, checking a file's metadata requires only a lightweight, inexpensive HTTP HEAD request (aws s3api head-object). This makes it a powerful tool for DevOps workflows, event-driven architectures, and data governance.
We will be using this command when uploading and attach a metadata instantly:
aws s3 cp archive-data.txt s3://learn-devops-vanpanugan-0001/ `
  --metadata "author=van,project=learn-devops,environment=test"
Since we have an existing object all ready. We can simply attach it. S3 object metadata is immutable. To update metadata on a file already in S3 without re-uploading the localfile, you must copy the object over itself while passing --metadat-directive REPLACE
aws s3 cp s3://learn-devops-vanpanugan-0001/archive-data.txt s3://learn-devops-vanpanugan-0001/archive-data.txt `
  --metadata "status=archived,reviewed=true" `
  --metadata-directive REPLACE
We now have successfully attached a metadata. Now let us check the metadata by using the previous command.
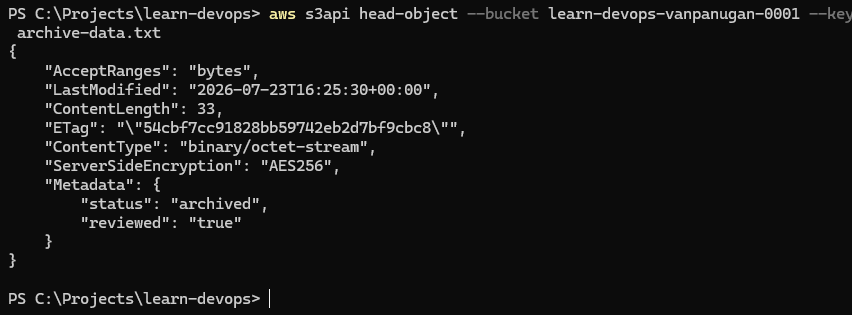
Shown above is the output of the metadata with the changes that we made!
Download the object back
Now let us tryin downloading the files and display it to the terminal by using this command.
aws s3 cp s3://learn-devops-YOURNAME-0001/test-object.txt downloaded.txt
Get-Content downloaded.txt
The image above shows that we have successfully download the file!
Lets try downloading multiple files and there are two ways.
-
The
syncCommand (Recommended for Folders)If you want to download an entire S3 bucket or folder,
syncis usually the best choice because it is smart: it compares the local directory to the S3 bucket and only downloads new or modified files based on file size and timestamps.aws s3 sync s3://learn-devops-vanpanugan-0001/ ./local-downloads -
The
cp --recursiveCommand (Download Everything)If you want to blindly copy all objects from a bucket or a specific prefix (folder) regardless of what is already on your local drive, add the
--recursiveflag to the standard copy command.aws s3 cp s3://learn-devops-vanpanugan-0001/archive/ ./local-archive --recursive
I’ll be doing the sync command.
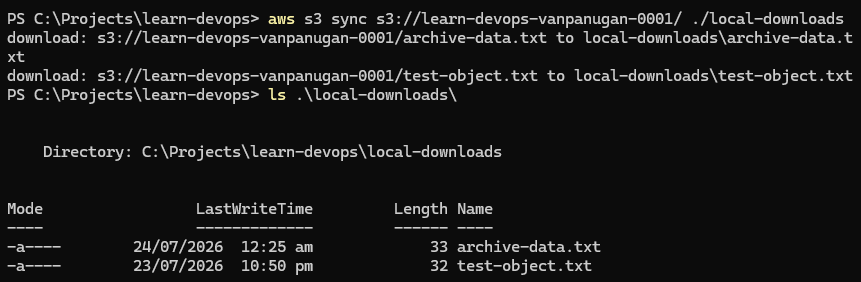
The output above shows that we were able to download the files! There are difference ways to download multiples files by applying conditions, filters and many more! Refer to the AWS S3 Documentations.
Clean up
Now we are at the last section! Before we end our lab, let us clean up our stuffs. Please take note that Standard_IA will still bill you 30 Days even you deleted it before the 30 day mark.
We will be using this command:
aws s3 rm s3://learn-devops-YOURNAME-0001/ --recursive
aws s3api delete-bucket --bucket learn-devops-YOURNAME-0001
We have now successfully deleted our stuff!!